QUICK LINKS
- Is It Safe to Make DIY E-Liquid?
- What Ingredients Do I Need to Make E-Liquid?
- Two Methods for Making E-Liquid
- What Equipment Do I Need to Make My Own Vape Juice?
- H2: DIY E-Liquid Tips and Tricks
- How to Mix the Ingredients to Make E-Liquid?
- What Should I Do When I Have Mixed My E-Liquid?
- Frequently Asked DIY Vape Juice Questions
- So, Who Is DIY E-Liquid Good For?
Nothing is more satisfying than vaping an e-liquid that you have made yourself. Vapers from all over are working on unique recipes and unforgettable flavor sensations from the comfort of their couch or garage. But exactly how do you make DIY vape juice?
The process is simple, but you have to invest in specific ingredients and equipment. The biggest sacrifice that you will have to make is your time. Even when you have committed your time, you still need to think about safety, mixing methods, and flavor compositions. Do you still want to transition from store-bought to DIY vape juice? Keep reading to learn everything you need to know about the process, as well as step-by-step methods for mixing e-liquid by weight and volume.
Is It Safe to Make DIY E-Liquid?
With the cost of everything rising, it is no wonder that DIY projects are becoming more and more popular. Thousands of vapers have made the switch from store-bought to DIY vape juice. One of the most common concerns is whether DIY e-juice is safe.
DIY projects are incomplete without safety controls. E-liquid is designed to be consumed, which means that you need to be aware of all the potential dangers. As well as ingredients, you have got to think about tools and handling. Making vape juice is a relatively simple process, but that does not mean that it is danger free.
Unusual Ingredients
We recommend steering clear of unusual ingredients, especially if this is your first time experimenting with DIY vape juice. It can be tempting to try some of the wackier suggestions on the internet, but you should always stay on the safe side.
Avoid these ingredients:
- Flavorings that are not available in store-bought e-liquids
- Oils
- Water
- Vodka
The use of water in DIY vapes is a contentious subject. Some people say that it makes a good base, while others claim that it renders their e-liquid useless. The most common reason why vapers add water to their vape juice is to dilute the nicotine strength.
High Nicotine Strengths
If you feel the temptation to load up on nicotine, you are not alone. It is not uncommon for vapers to experiment with higher doses of nicotine when they make their own e-juice. But beware, too much nicotine can have a negative impact on your health.
Nicotine poisoning (also known as being nic sick) happens when someone consumes too much nicotine. Everyone has a different tolerance level. A seasoned vaper might not get nic sick from 20mg of nicotine, but a beginner will definitely feel the effects.
The Centres for Disease Control and Prevention (CDC) has found that just 50 to 60mg of nicotine is a deadly dose for adults who weigh 150lbs. Some of the symptoms of nicotine poisoning are as follows:
- Increased heart rate
- Tremors
- Vomiting
- Seizures
- Lightheadedness
Most people do not experience the most severe symptoms of nic sickness. If you have consumed slightly too much nicotine you might experience headaches and tremors which will subside after a few hours.
Click here to read CDC’s conclusions about nicotine poisoning.
What Ingredients Do I Need to Make E-Liquid?
Vape juice is shockingly simple. There are only a few key ingredients, and you might recognize a few of them from household items.
Vegetable Glycerine (VG)
VG is an essential piece of the puzzle. It forms one-half of the base liquid for vape juice, with the other half being PG.
VG is a viscous liquid that is used in all sorts of products. You will find it listed as an ingredient in shampoo, moisturizer, and even toothpaste! In e-liquid, VG is used to give the mixture a thick texture. This ingredient promises dense, immense plumes of vapor.
Propylene Glycol (PG)
PG is much thinner than VG. Manufacturers use this ingredient in flavored teas, soft drinks, salad dressings, and baking mixes. This ingredient carries flavor much better than VG. It also guarantees the sort of throat hit that smokers experience. Beginners prefer high PG e-liquids because they replicate the feeling of smoking a cigarette.
You can buy VG and PG online. Make sure that the ingredients are USP grade before you buy them. This means that they meet or exceed the requirements set out by the United States Pharmacopeia and are acceptable for food, drug, or medicinal use.
Flavorings
A lot of vapers fall at this hurdle. There are so many flavorings to choose from, and there are even a few guides on how to create your own. We recommend avoiding oils in general, but especially essential oils.
In the world of DIY vape liquids, flavorings are called concentrates. When you buy concentrates, you can create your own flavors. There are a lot of things to think about, including the potency of each concentrate.
If the thought of choosing and mixing concentrates seems overwhelming, you can buy one-shots. One-shots are bottles of pre-mixed flavor concentrates. Some DIYers keep a stock of one-shots and simply mix them together to create delicious flavor sensations.
Nicotine
Nicotine is relatively easy to purchase. The most difficult part about buying nicotine is deciding on a concentration. You can buy 100ml bottles of nicotine in all sorts of concentrations. There is a sliding scale of concentrations for all kinds of vapers. If you are not accustomed to consuming nicotine, we recommend starting on the lower end of the spectrum.
You should always use gloves when you handle nicotine. High concentrations of nicotine can irritate the skin, so you should always keep it away from your eyes.
Two Methods for Making E-Liquid
DIYers use two main methods to create their own e-liquid. Before you start purchasing equipment, you need to decide which method you prefer.
Volume
Most beginners prefer this method. Liquids are measured by volume, so it is easy to understand the numbers. The only problem is that this method tends to be less accurate than using scales.
To measure by volume, you need syringes. Put your VG, PG, nicotine, and flavorings in individual syringes. Squeeze the syringes into your DIY vape juice bottle.
Struggling to understand nicotine strengths? Read our article to learn some tips and tricks.
Weight
If you do not feel comfortable mixing by volume, you can mix by weight. This method requires a scale and is far more accurate than mixing by volume.
Prepare your VG, PG, nicotine, and flavorings. Before you start mixing the ingredients, you need to use an e-liquid calculator. This calculator will do all the hard work for you. When you know what numbers you need, simply weigh your ingredients and mix them.
What Equipment Do I Need to Make My Own Vape Juice?
Now that you have all the ingredients, you need to invest in some equipment. The good news is that DIY e-liquid equipment is not expensive. Lots of the essential pieces of equipment can be as expensive or as cheap as you want them to be, and you might even have some of our recommendations in your home.
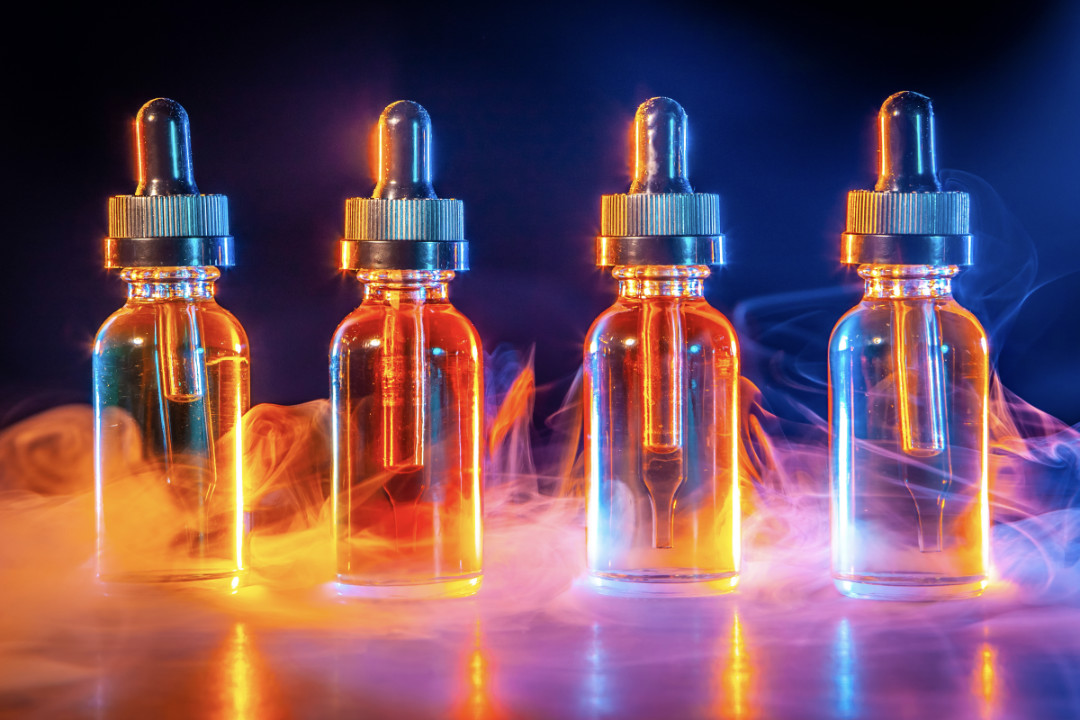
Bottles For Base Liquids and Nicotine
When you have bought your base liquids, you need to store them somewhere. It is more cost-effective to buy base liquids like VG and PG in big 1-liter containers, but they are not the easiest to pour.
We recommend using smaller bottles that have nozzle tips. 100ml bottles are ideal for people who want control and precision when they mix their base liquids. Squeezy bottles will give you even better grip and control.
Nicotine needs a bit more consideration. We recommend storing nicotine in amber bottles. This material will protect your nicotine from sunlight and contaminants.
Vape Liquid Bottles
Once you have perfected your recipe, you need somewhere to store it. You can choose from a number of cheap, readily-available plastics, but you should always go for something that is regulated. 10ml LDPE, PET, and HDPE plastic bottles are all available online, but there are some drawbacks to plastic containers.
There has been some speculation as to whether plastic is a good storage option. Some people hedge their bets and use glass, but there is a bigger risk of smashing glass containers.
Labels
There is nothing worse than laboring over a recipe and forgetting which bottle it is in. You can avoid this problem by investing in a label machine. Label machines can be costly, which is why some people opt for handmade labels. Just grab a few sheets of paper, a pen, and a pair of scissors. You can save your future self even more time by writing the ingredients on the label!
Gloves
If you want to put your safety first, you should always have a box of gloves nearby. VG, PG, and nicotine are by no means the most dangerous liquids on the planet, but they can irritate the skin. Besides, wearing gloves reduces the chances of spreading the liquids to other areas.
An Electronic Scale
A scale is only necessary for people who want to mix by weight. This piece of equipment might seem simple enough, but you need to make sure that your scale is precise to 0.01-gram. For the best results, get a scale that can weigh up to 500 grams.
Syringes and Needles
Syringes and needles are only necessary for people who want to mix by volume. You need to buy a few kinds of syringes. 10-30ml syringes are ideal for handling base liquids, but you should buy some needles if you plan on using very viscous VG. 14 gauge needles should work well.
We also recommend buying 1-5ml syringes for concentrates and nicotine. Remember, you need one syringe per ingredient.
H2: DIY E-Liquid Tips and Tricks
Before you begin mixing, you should be aware of a few tips and tricks that help DIYers create their own e-liquids.
Use an E-Liquid Calculator
You will struggle to replicate recipes and create unique combinations without an e-liquid calculator. Vape juice compositions are fiddly, especially for people who have never ventured out into the world of DIY vaping.
You can find a number of e-liquid calculators online. In simple terms, vape juice calculators are designed to do the hard work for you. Just input your desired outcome and the calculator will tell you how much of each ingredient you need to use.
We recommend this online vape juice calculator, but almost every online calculator has the same features.
Discover Online Communities
Did you know that there are hundreds of online communities dedicated to DIY vape juice? r/DIY_eJuice is just one online community that has dedicated weekly threads, FAQs, and even a section for beginners to ask questions.
e-liquid-recipes is another popular community for DIYers. The flavor stash tool recommends a list of possible e-liquid recipes based on the ingredients that you already have.
Beware of Differences Between Brands
Beginner DIYers who substitute flavors between brands may be disappointed. There are thousands of variations for even the most basic flavor profiles. Flavors like apple, banana, and blueberry might taste vastly different from one brand to the other. One brand might stay as true to the taste of banana as possible, whereas others might add a hint of menthol.
Another thing to consider is the strength of your flavor concentrates. Some brands create bold, vibrant flavor profiles that can overpower DIY e-liquid creations. You can be more liberal with other brands, but knowing the difference is the key. To better understand the strength of your flavor profile, consider looking at the average mixing quantity percentage.
Try Single Flavors On Their Own
It is not uncommon for DIYers to have a few single flavors that they use in multiple recipes. Flavors like vanilla work well in lots of recipes. If you think that you have found your first multi-purpose flavor, you should vape it alone. This is an invaluable experience, especially for people who are willing to take notes. You can jot down the subtle hues in the concentrate so that you know what to pair it with in the future.
How to Mix the Ingredients to Make E-Liquid?
Phew! Now you have all the ingredients and equipment that you need to make your own e-liquid. You have even chosen which method you want to use, which means that you are ready to create your first unique recipe.
It is tempting to just guess the exact amounts of each ingredient, but this can lead to an unsatisfying vape hit. We encourage DIYers to use an e-liquid calculator. Add in your desired amounts of VG, PG, and nicotine, and let the calculator do all the hard work. It will tell you how much of each element you need, and it even has a section for people who want to experiment with water and vodka! This calculator shows its results in grams and ml, which makes it ideal for both methods of mixing.
Mixing E-Liquid by Volume
If you have decided on the volume method, you need to look at the ml column on the online calculator.
- Prepare individual syringes for each ingredient.
- Place your plastic or glass bottle on a clean countertop. You can fill your bottle as high as you want, but we recommend leaving some room for error. Beginners who have a 60ml bottle might want to mix enough e-liquid for 55ml or 50ml of e-liquid.
- Squeeze the syringes into the bottle.
- Cap your bottle and shake it for a few minutes.
Mixing E-Liquid by Weight
If you want to use the weight method, you need to look at the grams column on the online calculator.
- Prepare individual syringes for each ingredient.
- Set your scale to 0.
- Put your plastic or glass e-liquid bottle on the scale.
- Squeeze each syringe into the bottle, making sure to set the scale to 0 after each ingredient.
- Cap your bottle and shake it for a few minutes.
What Should I Do When I Have Mixed My E-Liquid?
Almost there! Just a few more steps to go. We recommend that DIY vapers follow these steps to make the most of their new vape juices.
Label Your Bottle
This is by no means necessary but it does help DIY vapers orient themselves. It is not uncommon for beginners to get excited and create lots of different recipes in one go, which is where labeling comes in. You can avoid confusion in the long run by labeling your bottles and even keeping a small notebook or spreadsheet that details your recipe.
Steep Your E-Liquid
This is the most important thing that you can do after creating your e-liquid. Homemade vape liquid that includes more than one flavor concentrate needs to be steeped. Otherwise, the flavors will not mix together.
Steeping is a simple process, all it requires is time. The time varies from flavor to flavor. The more flavor profiles you want to include, the more time it will take for the mixture to steep. Some simple recipes do not need to be steeped. The good news is that most DIY e-liquid recipes come with recommended steep times.
Protect Your E-Liquid From Harsh Environments
As well as time, you have to think about location. E-liquid does not do well in hot environments. You need to store your vape liquid in a space that is dark and cool.
Try Your E-Liquid!
This is the part that you have been waiting for! After hours of research and recipe tweaks, you can finally try your e-liquid. We recommend putting your vape liquid in an atomizer instead of a tank because the flavor profiles will be more potent. Besides, if your experiment goes wrong, you will not have to waste a coil.
Frequently Asked DIY Vape Juice Questions
Can I Make E-Liquid Without VG and PG?
No, you cannot make DIY e-liquid without VG and PG. In terms of ingredients, vape liquid is simple. The base is always a combination of VG and PG.
You cannot eliminate VG or PG entirely, but you can experiment with different compositions. For a stronger throat hit and bolder flavors, add more PG to your mixture. For bigger clouds of vapor, add more VG.
Is DIY Vape Liquid Cheaper Than Store-Bought E-Liquid?
The best thing about DIY e-liquid is that you are in control. The finished product can be as affordable or as expensive as you want it to be.
Many DIY vapers find that once they have bought their initial stock of VG, PG, nicotine, and flavorings, their expenses reduce greatly. From there onwards, the biggest contribution is time.
How Long Does It Take To Make DIY Vape Liquid?
The most time-consuming part of making DIY e-liquid is the beginning. But once you have got all your base ingredients and equipment, you should be able to complete a recipe in a few minutes. Of course, this does not take into account time for recipe tweaks and second, third, and fourth attempts.
How Long Does DIY E-Liquid Last Before Going Bad?
Most e-liquid brands claim that their vape liquids can last up to two years, as long as they are stored in a cool, dark place. Sunlight can cause the ingredients to decompose, so storing your liquid in the right place is very important.
DIY e-liquid can last for a while, but we do not recommend leaving your vape juice for up to two years. Manufacturers can ensure that specific conditions are met, and it is difficult for DIY vapers to replicate those conditions in their homes. To ensure that your vape liquid lasts for as long as possible, you should seal your bottle with an airtight cap and keep it away from direct sunlight.
If you notice signs of discoloration, you should not attempt to vape your e-liquid. Another sign of deterioration is an ‘off’ smell.
So, Who Is DIY E-Liquid Good For?
Since the dawn of time, experienced vapers have been making their own concoctions. All the ingredients and equipment necessary to create vape liquid are readily available online, which makes DIY e-liquid accessible to the masses.
Anyone who wants to take control of their vape experience can do so, all it takes is a bit of research and forward planning. Making your own e-liquid is more time-consuming than buying store-bought liquids, but the rewards are massive. You can create flavor profiles that no one has ever heard of before and, even better, you can save money in the long run.